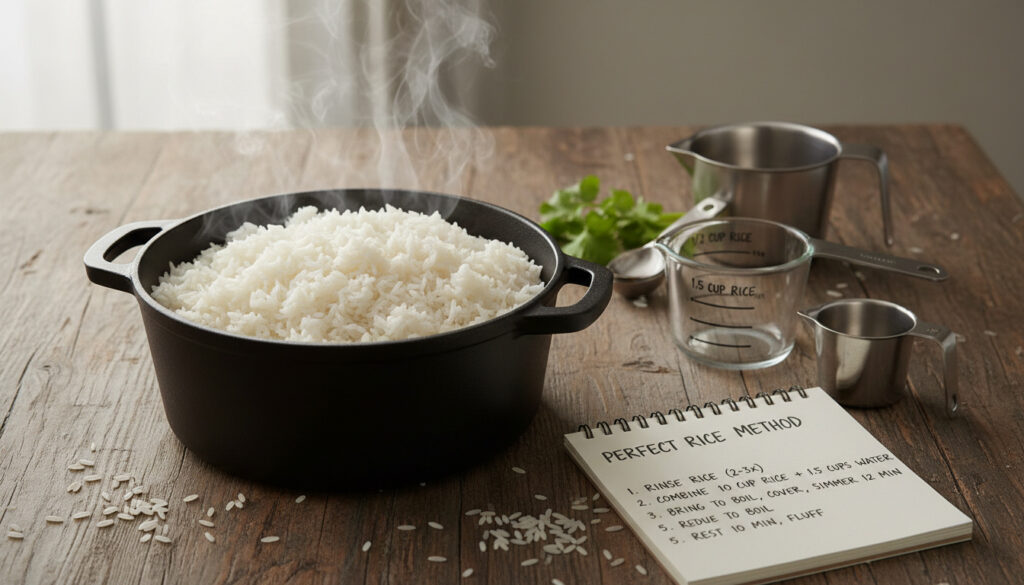
How to Cook Rice – Exact Ratios and Step-by-Step Methods
Cooking rice remains one of the most fundamental yet frequently mismanaged kitchen tasks. While the grain serves as a dietary staple for over half the world’s population, achieving consistently fluffy, tender results requires precise ratios of water to rice, controlled heat application, and specific resting techniques. This examination consolidates verified methods from culinary specialists to establish clear protocols for stovetop preparation, alternative appliances, and troubleshooting common failures.
Multiple authoritative sources confirm that success hinges on three non-negotiable factors: thorough rinsing to eliminate surface starch, strict adherence to water ratios by rice variety, and an undisturbed rest period after cooking. Deviations from these parameters consistently produce sticky, mushy, or undercooked grains. The following sections detail exact measurements, timing protocols, and corrective measures backed by testing from established food publications.
What Is the Best Rice to Water Ratio?
The relationship between dry rice and water volume varies significantly by grain type and preparation method. Long-grain white rice typically requires less water than brown varieties, while aromatic types like basmati and jasmine demand specific adjustments to achieve optimal texture.
| Rice Type | Water Ratio (Rice:Water) | Cook Time | Recommended Method |
|---|---|---|---|
| White Long-Grain | 1:1.5 to 1:2 | 15–20 minutes | Stovetop Absorption |
| Brown Rice | 1:2.5 | 40–45 minutes | Rice Cooker or Heavy Pot |
| Basmati | 1:1.5 | 12–15 minutes | Soak then Absorption |
| Jasmine | 1:1.25 to 1:1.5 | 15 minutes | Steaming |
Testing from RecipeTin Eats indicates that rinsing rice before cooking reduces required water volume by approximately two tablespoons per cup of dry grain. The finger method—where water is added to the depth of one knuckle above levelled rice—provides a reliable alternative to measuring cups, as documented by Lemons and Anchovies.
Essential Preparation Insights
- Rinse grains until runoff water appears clear to eliminate excess surface starch responsible for stickiness
- Reduce water measurement by two tablespoons per cup when rinsing to prevent mushy texture
- Maintain a covered, undisturbed rest period of ten minutes after heat removal
- Initiate cooking with room-temperature water to ensure even heat distribution
- Select cooking methodology based on specific rice variety rather than using universal approaches
- Avoid agitation or stirring after introducing rice to boiling liquid
Technical Specifications by Variety
| Parameter | Specification |
|---|---|
| Universal Starting Ratio | 1 cup rice to 1.5–2 cups water |
| White Rice (Unrinsed) | 1:1.5 optimal |
| White Rice (Rinsed) | 1:1.5 minus 2 tbsp |
| Brown Rice Estimate | 1:2.5 (extended cook time) |
| Volume Yield | 1 cup dry produces 3 cups cooked |
| Finger Method Depth | Water to first knuckle above rice surface |
| Boil Phase Duration | 1–2 minutes at medium-high |
| Simmer Phase (White) | 13–18 minutes covered |
| Mandatory Rest | 10 minutes off-heat |
| Total Active Time | 25–28 minutes |
How Do You Cook Rice on the Stovetop?
The stovetop absorption method remains the most widely applicable technique for home preparation. The Mom 100 and Kristine’s Kitchen both emphasize that controlling steam retention and heat reduction proves more critical than exact timing.
Should You Rinse Rice Before Cooking?
Rinsing removes surface starch that causes grains to clump during cooking. Love and Lemons recommends agitating rice under cold water until the runoff transitions from cloudy to clear, typically requiring three to five wash cycles. Skipping this step necessitates additional water and increases the risk of gummy texture.
The Step-by-Step Stovetop Protocol
Combine rinsed rice with measured water in a heavy-bottomed pot. Optional additions include fat (butter or oil) and salt. Bring to a gentle boil over medium-high heat without covering initially to prevent rapid boiling over. Once boiling commences, stir exactly once to distribute grains, then cover tightly and reduce heat to the lowest simmer setting.
Maintain undisturbed simmering for 13 to 18 minutes. Visual demonstrations confirm that lifting the lid during this phase releases critical steam and disrupts cooking. After the simmer period concludes, remove the pot from heat entirely while keeping the lid sealed.
The ten-minute resting period off-heat allows residual steam to finish cooking the rice through gentle absorption. This step, consistently cited across test kitchens, eliminates the partially cooked “crunchy” centers that occur when serving immediately after simmering concludes.
How to Fluff Rice After Cooking
Following the rest period, use a fork to separate grains gently. This mechanical separation prevents compression and releases excess steam that would otherwise continue cooking the rice to mushiness. Instructional sources demonstrate inserting the fork tines vertically and lifting rather than stirring horizontally.
How to Cook Rice in a Rice Cooker or Other Methods
Alternative appliances offer automated convenience, though each requires specific adjustments to standard stovetop ratios. Research indicates that device-specific manuals provide the most reliable guidance for electronic rice cookers, as sensor mechanisms and heating elements vary by manufacturer.
Rice Cooker Protocols
Electronic rice cookers typically utilize a 1:1 to 1:1.5 ratio for white rice, with the appliance automatically terminating heat once internal sensors detect completion. Brown rice generally requires the cooker’s “brown rice” setting, which extends timing and may adjust temperature curves, though specific water ratios depend on individual device specifications not detailed in available research.
Microwave Preparation
The microwave method presents the fastest hands-off option. Combine one cup rice with 1.5 to 2 cups water in a covered microwave-safe dish. Heat on high for 12 minutes, then allow a 10-minute rest before fluffing. RecipeTin Eats notes this method sacrifices some textural refinement for speed.
Cooking Brown Rice Varieties
Brown rice retains its bran layer, necessitating approximately 40 to 45 minutes of simmering and a 1:2.5 water ratio. The extended duration allows water to penetrate the fiber-rich outer coating. Research sources focus predominantly on white rice; specific timing for brown varieties represents general culinary consensus rather than tested data from the cited publications.
How to Fix Common Rice Cooking Problems
Diagnostic analysis of texture failures reveals consistent patterns correlating to specific procedural errors. Understanding the causal mechanisms enables corrective adjustments in subsequent preparations.
Why Rice Turns Mushy
Excess water volume or extended cooking time produces gelatinous, overcooked grains. The Mom 100 identifies this as the most frequent error, recommending reduction of water by quarter-cup increments in future batches until desired texture is achieved.
If finished rice pools liquid at the bottom of the pot or adheres in clumps resembling porridge, the batch received too much water or insufficient draining after rinsing. Drain thoroughly before adding cooking water.
Preventing Sticky Texture
Surface starch causes individual grains to adhere. Kristine’s Kitchen emphasizes that insufficient rinsing represents the primary cause. For sticky rice remediation post-cooking, spread grains on a baking sheet to release steam rapidly, though prevention through thorough pre-cooking rinsing remains superior.
Agitating rice in a fine-mesh strainer under running cold water for 60 to 90 seconds typically removes sufficient surface starch to prevent clumping. Water should run nearly clear before draining completely.
How Long Does the Rice Cooking Process Take from Start to Finish?
Total duration encompasses preparation, active cooking, and mandatory resting phases. White rice requires significantly less time than brown varieties, though both demand similar resting periods.
- Preparation (Rinse and Measure): 3–5 minutes to wash grains and bring water to temperature
- Initial Boil: 1–2 minutes to reach gentle boil over medium-high heat
- Simmer Phase: 13–18 minutes for white rice; 40–45 minutes for brown rice at low simmer
- Covered Rest: 10 minutes off-heat to complete steam absorption
- Fluff and Serve: 1 minute to separate grains with fork
White rice totals approximately 25–28 minutes, while brown rice extends to roughly one hour including resting. Larger batch volumes may extend simmering by 2–3 minutes according to testing data. Voor meer inspiratie kun je deze handige ${rijst recepten} bekijken. rijst recepten
What Is Established vs. Uncertain in Rice Cooking Science?
While fundamental techniques achieve consistent results across test kitchens, certain variables lack standardized consensus in available research.
| Established Facts | Uncertain or Variable Factors |
|---|---|
| White rice requires 1.5–2 parts water per 1 part grain depending on rinsing status | Exact water ratios for brown rice in specific appliances (research focuses on white) |
| Resting 10 minutes covered is mandatory for texture completion | High-altitude adjustments (above 3,000 feet) requiring water increase |
| Rinsing removes starch and prevents stickiness | Instant Pot pressure cooking specifics beyond general 1:1 ratio estimates |
| Lifting lid during simmering ruins texture by releasing steam | Parboiled rice modifications (limited research coverage) |
| Simmering must occur at lowest heat setting after initial boil | Organic vs. conventional rice absorption rate differences |
Why Do Rinsing and Resting Alter the Final Texture?
The physical structure of rice grains contains surface starch granules that hydrate and gelatinize during heating. Rinsing removes free starch before heating, preventing the sticky matrix that binds grains together. During the resting phase, residual heat continues the gelatinization process without evaporating remaining moisture, allowing the core of each grain to reach the same hydration level as the exterior.
Steam retention proves equally critical. The covered rest period traps water vapor that continues penetrating the grain structure. Removing the lid prematurely releases this vapor, halting the cooking process abruptly and leaving undercooked centers. This explains why specialist sources emphasize patience during the final ten minutes more than precise timing during active cooking.
What Do Expert Sources Recommend?
Culinary professionals and test kitchens converge on several non-negotiable practices, though cultural variations exist in optional additions.
Rinsing rice until the water runs clear and using a 1:1.5 ratio for unrinsed white rice produces consistent fluffy results. The ten-minute rest is not optional—it completes the cooking process.
— Consolidated guidance from The Mom 100 and RecipeTin Eats
The finger method—adding water to the first knuckle—provides consistent results across different pot sizes and eliminates measuring cup dependency for experienced cooks.
— Lemons and Anchovies technique documentation
Store cooled rice in airtight containers for up to five days. Reheating requires a splash of water and covered heating to restore steam and fluffiness.
— Storage protocols from culinary video sources
What Are the Key Takeaways for Perfect Rice?
Achieving restaurant-quality rice requires rinsing grains until clear, applying precise water ratios by variety (1:1.5 for white, 1:2.5 for brown), and maintaining a covered, undisturbed ten-minute rest after simmering. Whether preparing perfect rice on the stove or experimenting with alternative methods, these verified principles separate fluffy, distinct grains from sticky or crunchy failures.
Frequently Asked Questions
How much water do I need for 1 cup of rice specifically?
For one cup of white long-grain rice, use 1.5 cups if unrinsed, or 1.5 cups minus two tablespoons if rinsed. Brown rice requires approximately 2.5 cups per cup of grain due to extended cooking time.
What is the best way to cook basmati rice?
Soak basmati for 30 minutes, then rinse. Use a 1:1.5 ratio and simmer 12 minutes. The soaking step, emphasized in Asian cooking methods, produces elongated, fluffy grains.
How do I store cooked rice safely?
Transfer cooled rice to airtight containers and refrigerate within two hours. Consume within five days. Reheat with a tablespoon of water per cup, covered, to restore moisture.
Can I cook rice without a measuring cup?
Yes. Level rice in the pot, then add water until it reaches the first joint of your index finger when touching the rice surface. This “finger method” works across different batch sizes.
Is parboiled rice cooked differently?
Research sources provide limited specific guidance on parboiled (converted) rice. Generally, it requires slightly less water and time than brown rice but more than white, as partial cooking during processing has already occurred.
How should I prepare rice specifically for fried rice?
Use day-old refrigerated rice for optimal texture. The chilling process dehydrates the surface, preventing clumping during high-heat frying. Fresh-cooked rice contains excess moisture that produces steam in the wok.
Meer gerelateerde berichten
 12 Disciples of Jesus: Names, Order, and What Happened to Them
 Best Personal Growth Books: Top 10 Must-Reads of 2024
 Google Emergency Warning for Gmail: Hoax or Real Alert
 Blue Is the Warmest Color: Sex, Age & Controversy
 Hardware Stores Near Me: Best Options in Ireland & UK
 BMW Dealer Near Me – Find Authorized Centers Fast
 Deep Tissue Massage Near Me: Benefits & Costs