Air Fryer Baked Potato: Time, Temp & Diabetic Tips
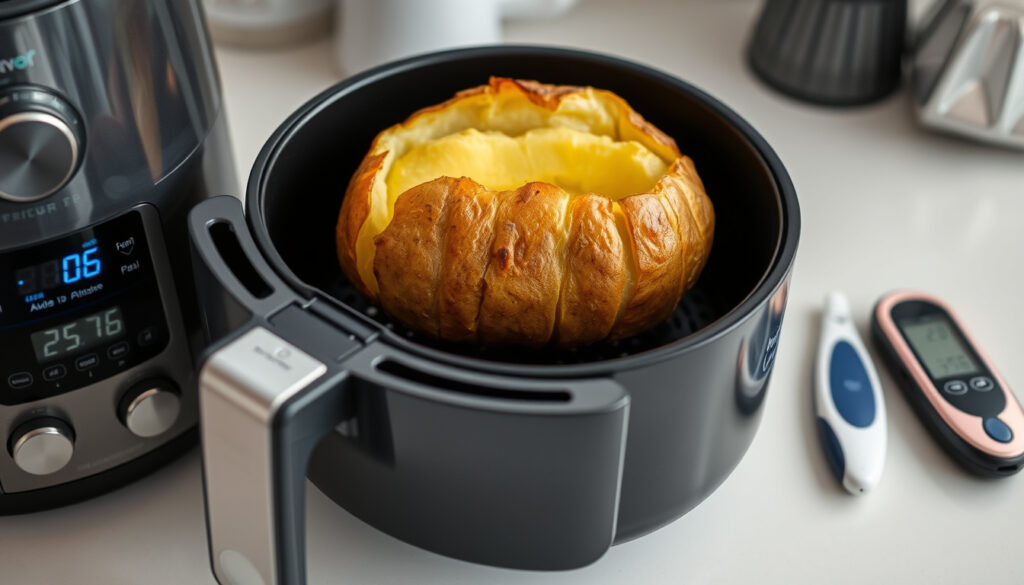
There’s something deeply satisfying about a perfectly baked potato—fluffy inside, crispy skin, and ready to hold a mountain of toppings—but when the oven takes an hour just to get there, the air fryer becomes a tempting shortcut. This guide breaks down the time, temperature, and techniques for an air fryer baked potato, plus a look at how it fits into a balanced diet—especially if you’re watching your blood sugar.
Average cooking time at 400°F: 35–45 minutes ·
Optimal air fryer temperature: 400°F (200°C) ·
Calories in a medium baked potato: 161 kcal ·
Oil needed for crispy skin: 1–2 teaspoons
Quick snapshot
- Medium potato: 35–45 min at 400°F (Natasha’s Kitchen (popular recipe site))
- Flip halfway for even cooking (Oh Sweet Basil (food blog))
- Add 5–10 min per extra potato (Natasha’s Kitchen (popular recipe site))
- Wash, dry, poke holes with fork (With the Woodruffs (family cooking site))
- Coat with oil and salt (optional seasoning) (Love and Lemons (recipe site))
- Microwave 3–5 min to reduce time (optional) (With the Woodruffs (family cooking site))
- Baked potato has high GI (≈85) (American Diabetes Association (dietary guidance))
- Pair with protein/fat to slow glucose absorption (American Diabetes Association (dietary guidance))
- Air fryer uses less oil than deep frying (American Diabetes Association (dietary guidance))
- Single layer in basket, no crowding (Natasha’s Kitchen)
- Preheat air fryer for 3 min if model requires (YouTube home cook method)
- Use basket-style for best air circulation (Natasha’s Kitchen)
Seven key facts at a glance, one pattern: the air fryer delivers speed and texture benefits, but glycemic impact remains high.
| Fact | Value |
|---|---|
| Potato size (medium) | 5–6 oz (140–170 g) |
| Calories (medium, no toppings) | 161 kcal — USDA FSIS (food safety authority) |
| Carbohydrates | 37 g |
| Fiber | 4 g |
| Glycemic Index | 85 (high) |
| Air fryer cooking time | 35–45 minutes |
| Oven time at 400°F | 50–60 minutes |
How Long Does a Baked Potato Take in the Air Fryer?
Standard cooking time for single potato
The consensus across tested recipes points to 400°F (200°C) and 35–45 minutes for a medium russet potato (Oh Sweet Basil (food blog)). Larger spuds—9 ounces or more—can require up to 50 minutes (Everyday Family Cooking (recipe site)). Flipping the potato halfway through promotes even browning, though some cooks find it optional (A Pinch of Healthy (nutrition-focused blog)).
“Air fryer baked potatoes take 40–50 minutes at 200°C; rub with oil for best results.”
— BBC Good Food recipe guidance (trusted UK publisher)
Factors affecting cooking time: size, variety, air fryer model
- Weight matters: 7 oz ≈ 35 min, 8 oz ≈ 40 min, 9 oz+ ≈ 45–50 min (Natasha’s Kitchen (popular recipe site)).
- Russets cook faster than waxy varieties like red potatoes.
- Basket-style air fryers run hotter than toaster-style; a toaster model may need 375°F instead of 400°F (Natasha’s Kitchen).
How to test for doneness
The fork-tender test is the gold standard: a fork should slide in with little resistance. For precision, internal temperature should reach 205°F to 210°F (With the Woodruffs (family cooking site)). Let the potato rest 2–3 minutes before slicing to let steam settle (Everyday Family Cooking).
The implication: while these variables shift cook times, a thermometer eliminates guesswork for perfect fluffiness.
Air frying delivers speed, but a temperature variation of 25°F between basket and toaster models can shift cook times by 10 minutes. Check early, check often.
Do You Need to Microwave Potatoes Before Air Frying?
Pros of microwaving first: reduced total time
Microwaving a raw potato for 3–5 minutes can cut air-fryer time by 10–15 minutes. One YouTube method suggests microwaving first, then finishing in the air fryer for about 50–55 minutes total (YouTube air fryer baked potato video (home cook)). This approach appeals when you’re really pressed for time.
Cons: softer skin, moisture loss
The trade-off: microwaving partially cooks the interior but leaves the skin less crispy. Several recipe authors skip the step because the air fryer alone already yields crisp skin (Love and Lemons (recipe site)). The degree of crispiness loss varies by potato variety and moisture content.
Step-by-step: microwave 3–5 minutes then air fry
- Wash and dry the potato thoroughly. Poke several holes with a fork.
- Place on a microwave-safe plate and microwave on high for 3–5 minutes (depending on size).
- Carefully remove (potato will be hot), rub with oil and salt.
- Air fry at 400°F for 20–25 minutes, or until fork-tender.
The resulting skin will be edible but not as shatter-crisp as the no-microwave route. For maximum crunch, skip the microwave and go straight to air frying.
If you value crispiness above all, don’t microwave. If speed is the priority, the microwave shortcut works—just set expectations for texture.
The takeaway: choose based on your texture priority, not on time alone.
Can I Just Put Raw Potatoes in the Air Fryer?
Yes, raw potatoes work without pre-cooking
Absolutely—no pre-boiling, microwaving, or par-baking needed. Raw potatoes go straight into the air fryer and come out perfectly cooked in the same 35–45 minute window (Natasha’s Kitchen). This is the simplest method and yields the crispiest skin.
Necessary preparation: wash, dry, poke holes, oil and season
- Wash and dry thoroughly. Damp skin steams rather than crisps.
- Poke several holes with a fork to vent steam—skipping this can cause the potato to burst (With the Woodruffs).
- Rub with oil (1–2 teaspoons) and sprinkle with salt. This is what creates the signature crunchy crust (Love and Lemons).
Comparison with pre-cooked methods
Raw-to-air-fryer takes the same total time as microwaving-then-air-frying, but the oven-like dry heat of the air fryer alone produces a noticeably firmer, more crackling skin. Pre-cooking methods soften the skin because the microwave adds moisture to the exterior (Oh Sweet Basil).
Is It Faster to Bake a Potato in the Oven or Air Fryer?
Three contrasts between the two methods, one pattern: the air fryer wins on speed and energy, but the oven can handle more potatoes at once.
| Factor | Air Fryer | Conventional Oven (400°F) |
|---|---|---|
| Cook time (medium potato) | 35–45 minutes | 50–60 minutes (Natasha’s Kitchen) |
| Energy usage | ~1400W for 40 min = ~0.93 kWh | ~2400W for 55 min = ~2.2 kWh |
| Skin crispiness | Very crispy (direct hot air circulation) | Less crispy (still good if pricked and oiled) |
One recipe source notes that two potatoes in an air fryer finish in about 40 minutes, versus over an hour in the oven (Serious Eats (culinary science resource)). The air fryer’s smaller chamber heats up faster and uses roughly 60% less electricity for a single potato batch.
If you’re cooking for a family (4 or more potatoes), the oven’s capacity may outweigh the speed advantage. The air fryer excels at 1–2 servings.
For small batches, the air fryer is clearly faster and more efficient.
Can a Diabetic Eat a Baked Potato?
Glycemic impact of baked potatoes
A medium baked russet potato has a glycemic index (GI) of about 85, placing it in the high category (American Diabetes Association (dietary guidance)). That means it can raise blood sugar quickly if eaten alone. However, potatoes are also a good source of fiber (4 g per medium potato) and vitamin C.
“A medium russet baked potato (skin on) provides 161 kcal, 37 g carbs, 4 g fiber.”
— USDA FoodData Central (national nutritional database)
Portion control and pairing with protein/fat
The ADA recommends treating potatoes as a starchy vegetable and portioning about ½ a medium potato (roughly 80 g carbohydrate) as part of a meal. Pairing with lean protein (chicken, fish) and non-starchy vegetables (broccoli, salad) blunts the glycemic spike (American Diabetes Association). A dollop of Greek yogurt or avocado adds fat that further slows glucose absorption.
“Portion control and pairing high-GI foods like potatoes with lean protein and non-starchy vegetables helps manage blood sugar response.”
— American Diabetes Association general guidance (leading health organization)
Comparison with french fries for blood sugar
French fries have a similar GI (about 75) but are typically deep-fried, adding more fat and acrylamide—a potential carcinogen formed during high-heat cooking. Air-fried potatoes use far less oil (USDA FSIS). For a diabetic, an air fryer baked potato with the skin on and a sensible portion is a far better choice than fast-food fries.
The pattern: strategic pairings make the air fryer potato a workable option for blood sugar management.
Upsides
- Faster than oven baking (35–45 min vs 50–60 min)
- Crispier skin thanks to concentrated hot air
- Uses less energy per potato
- Simple cleanup
Downsides
- Small capacity (usually 1–2 potatoes)
- Can be tricky to get consistent doneness across different air fryer models
- High glycemic index may require meal planning for diabetics
Step-by-Step Instructions: Classic Air Fryer Baked Potato
- Preheat air fryer to 400°F (if your model requires—some don’t; check manual).
- Prepare potato: scrub clean, dry thoroughly, poke 6–8 holes with a fork.
- Season: rub 1–2 teaspoons of olive oil over the skin, then sprinkle with salt.
- Air fry: place in a single layer in the basket. Cook 35–45 minutes, flipping halfway.
- Check doneness: a fork should slide in easily; internal temp 205–210°F.
- Rest and serve: let sit 2–3 minutes, then split open and add toppings.
What’s Certain, What’s Still Fuzzy
Confirmed facts
- Air frying reduces bake time by 20–30 minutes compared to a conventional oven.
- Raw potatoes can be air fried without pre-cooking.
- Baked potatoes have a high glycemic index (≈85).
What’s unclear
- Microwaving before air frying can cut total time by 10–15 minutes – exact time saving varies.
- Optimal preheating time for air fryers varies by model.
- Exact impact of microwaving on final crispiness depends on potato variety and moisture content.
- Whether air frying produces significantly fewer advanced glycation end-products than oven baking.
For anyone juggling convenience and health, the air fryer baked potato offers a genuine upgrade: it’s faster, crispier, and uses less oil than oven baking or deep frying. But the high glycemic index means those managing blood sugar still need to be thoughtful about portions and pairings. The trade-off is clear: you can enjoy a fluffy, skin-crackling potato in under 45 minutes, provided you pair it with protein and vegetables. For the time-starved cook who also cares about glucose response, air frying is the smartest path to a classic comfort food.
For a detailed step-by-step approach, check out this air fryer baked potato guide that includes pre-microwave tips and diabetic-friendly advice.
Frequently asked questions
Should I preheat the air fryer before adding potatoes?
It depends on your model. Many basket-style air fryers do not require preheating; toaster-style ovens often benefit from a 3-minute warm-up. Check your manual for the best practice.
What type of potato is best for air frying?
Russet (baking) potatoes are ideal because they’re high in starch, yielding a fluffy interior and crisp skin. Yukon Golds work too but produce a denser texture.
How do I get extra crispy skin on an air fryer baked potato?
Dry the potato thoroughly before oiling, use enough oil to coat evenly, and don’t overcrowd the basket. Flipping halfway also helps. Some cooks add a light sprinkle of cornstarch for extra crunch.
Can I cook more than two potatoes at once?
Yes, but they must be in a single layer with space around each. Too many potatoes will steam rather than crisp, and cooking time will increase. For 4 potatoes, use a larger air fryer or cook in batches.
Is it safe to put aluminum foil in an air fryer?
Yes, but only if it’s weighted down (e.g., wrapped around the potato) and doesn’t block air circulation. Avoid covering the entire basket bottom, as it restricts airflow and can cause uneven cooking.
How to reheat a leftover air fryer baked potato?
Reheat in the air fryer at 350°F for 5–7 minutes. This revives the crispiness better than a microwave. You can also slice and reheat as potato wedges.
Can I add cheese or toppings before finishing the air fry?
Yes—in the last 2–3 minutes, open the basket, add cheese, bacon bits, or butter, and let it melt. Be careful not to drop toppings that may burn or drip.
Meer gerelateerde berichten
 Massachusetts Institute of Technology: Rankings, MIT vs Harvard
 Pink Salt Weight Loss Recipe: Viral Trends and Real Insights
 How Long to Cook Bacon in Oven: Perfect Timing Guide
 Aston Villa vs Arsenal: Score, Prediction, H2H Stats & TV Guide
 50 30 20 Rule: Budget Guide, Calculator & Examples
 Jonathan Majors and Meagan Good: Conviction & Marriage
 Cast of Road House 2024: Gyllenhaal, McGregor Full List
 Propitious Mango Ice Cream: Origin, Ingredients, Health Facts
